Are you someone who still enjoys using CDs or DVDs to listen to music, watch movies, or install software on your Lenovo laptop? If so, you might be wondering how to open the CD drive on your device. Don’t worry! In this guide, we will walk you through the simple steps to access your CD drive effortlessly.
But that’s not all! We will also address other common DVD-related questions, such as which DVD is best for Windows 10, why VLC may not be playing your DVD, and how to fix a missing DVD drive on Windows 10, 8, or 7. So, whether you’re a tech-savvy individual or a curious newbie, keep reading to find out all you need to know about your Lenovo laptop’s CD drive.
Let’s dive right in and discover how to access your CD drive on your Lenovo laptop, troubleshoot DVD playback issues, and maximize your DVD experience in 2023!

How to Unleash the Hidden Powers of Your Lenovo Laptop’s CD Drive
So, you find yourself staring blankly at your Lenovo laptop, perplexed by the mysterious CD drive sitting innocently on its side. You may be wondering, “How on earth do I open this thing?” Fear not, my friend! In this guide, I’ll unveil the secrets of your Lenovo laptop’s CD drive and show you how to access its incredible powers. Get ready to embark on a magical journey of technology and wonder!
Unleashing the Beast: Opening the CD Drive
Step 1: The Hunt for the Evasive Button
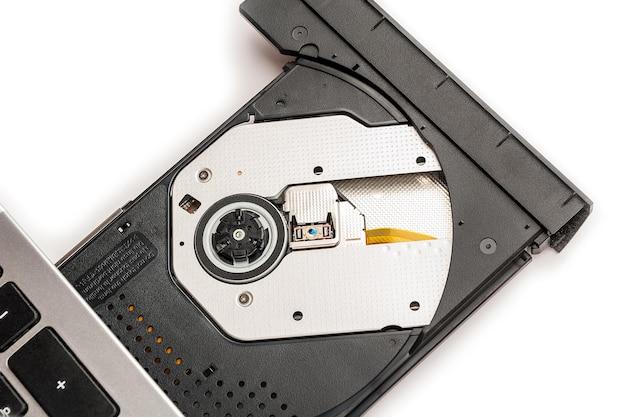
First things first, we need to locate the enchanted button that will grant us access to the CD drive kingdom. This elusive button often likes to disguise itself, blending seamlessly with your laptop’s design. But fear not, for you shall find it! Take a closer look at the front of your laptop, where wonders await!
Step 2: The Mighty Push
Once you’ve found the hidden button, it’s time to summon your strength and push it with conviction. Put aside your doubts and give it a firm press, like a hero embarking on a noble quest. With a satisfying click, the CD drive will come to life, eagerly awaiting your command.
Reveling in the Glory: Exploring CD Drive Functions
Unveiling the Magic: Inserting a Disc
Now that the CD drive has gracefully opened its jaws, it’s time to feed it with the ancient knowledge recorded on discs. But how do you do that, you may wonder? It’s as easy as pie! Simply take your disc of choice and gently place it in the inviting embrace of the CD drive. Slide it in until you feel the resistance, and then release. There you have it – the CD drive will securely hold your precious disc, ready to dazzle you with its contents.
Banishing the Darkness: Closing the CD Drive
Once you’ve finished marveling at the incredible technology inside the CD drive, it’s time to bid it a temporary farewell. But fret not, my friend, for closing the CD drive is as simple as opening it. Give the disc inside a quick farewell nod and gently push the CD drive back into its resting place. With another satisfying click, your CD drive will be safe and secure, patiently awaiting your next summon.
Conclusion: Embrace the Power!
Congratulations, brave individuals! You have now mastered the ancient art of opening and closing the CD drive on your Lenovo laptop. It may seem like a small victory, but never underestimate the joy and excitement that lies within these mysterious compartments. Harness the power of the CD drive, explore the secrets of your favorite discs, and unleash your creativity. The world is at your fingertips, and with your Lenovo laptop by your side, the possibilities are endless!
Now go forth, my friend, and embark on your own magical CD drive adventures. May your discs be scratch-free and your experiences be extraordinary as you navigate the wondrous realms of technology. Open your CD drive with confidence, for you are now a master of this ancient art form!
Stay tuned for more enlightening quests and captivating insights on the wondrous world of technology and beyond.
P.S.: May your CD drive always be ready and willing, much like your favorite delivery service when you order a pizza! Happy adventures, my brave friends!
FAQ: How to Open the CD Drive on Your Lenovo Laptop?
Introduction:
Welcome to our comprehensive FAQ guide on how to open the CD drive on your Lenovo laptop! Whether you’re a tech newbie or a seasoned user, we’ve got you covered. In this FAQ-style subsection, we’ll address common questions related to CD drives, DVDs, and troubleshooting tips. So, grab your favorite snack, sit back, and let’s dive in!
How do I Open the CD Drive on My Lenovo Laptop
If you’re wondering how to open the CD drive on your Lenovo laptop, fret not! We’ve got a step-by-step guide to make it super easy for you. Just follow these simple instructions:
-
Locate the CD drive on your Lenovo laptop. It’s usually a small rectangular button, sometimes marked with an eject symbol or identified as the DVD drive.
-
Ensure your laptop is powered on and not in sleep mode. Press the eject button firmly but gently. You might hear a subtle click sound, indicating that the CD drive is opening.
-
The CD drive tray should slide out gracefully. Place your CD or DVD on the tray, making sure it sits securely on the spindle.
-
Gently push the CD drive tray back in, and that’s it! Your Lenovo laptop is ready to play the content from the CD or DVD.
Which DVD is Best for Windows 10
When it comes to choosing a DVD that works smoothly with Windows 10, it’s essential to consider compatibility and performance. Here are some key factors to look for while making your selection:
-
DVD Format: Opt for DVDs that are compatible with Windows systems, such as DVD-R, DVD+R, DVD-RW, or DVD+RW. These formats are widely supported by Windows 10.
-
Storage Capacity: Depending on your needs, choose DVDs with sufficient storage capacity. Single-layer DVDs generally hold around 4.7GB, whereas dual-layer DVDs can store up to 8.5GB of data.
-
Brand Reliability: Stick to reputable brands known for their quality and compatibility. Options like Verbatim, Sony, and HP usually have good track records.
Remember, selecting the best DVD for Windows 10 ensures a smooth and hassle-free experience while using your Lenovo laptop’s CD drive.
Why Won’t VLC Play My DVD
So, you’ve tried playing a DVD using VLC media player but encountered a roadblock? Don’t worry, we’ve got a few troubleshooting tips to help you out:
-
Check DVD Region: DVDs are often divided into regions, and if the DVD’s region code doesn’t match your DVD drive’s region, VLC won’t play it. You can adjust VLC’s DVD region settings by going to “Tools > Preferences > DVD” and selecting the appropriate region.
-
Update VLC: Ensure you’re using the latest version of VLC media player. Outdated versions may have compatibility issues with certain DVDs. Visit the official VLC website to download and install the latest version available.
-
Install Libdvdcss: Some DVDs are encrypted to protect against piracy, and VLC requires additional software to decrypt them. Download and install the “libdvdcss” library, compatible with your operating system, to enable VLC to play encrypted DVDs.
How do I Fix my DVD Drive Missing from Windows 10, 8, 7
If you find that your DVD drive is missing from Windows 10, 8, or 7, it can be a frustrating experience. However, fear not! Here are a few troubleshooting steps to help resolve this issue:
-
Check Device Manager: Open the Device Manager by right-clicking on the Start button and selecting “Device Manager.” Look for the DVD/CD-ROM drives category and expand it. If you see a yellow exclamation mark or a “Unknown device” label, right-click on it and choose “Update driver.”
-
Restart Your Laptop: Sometimes, a simple restart can work wonders. Restart your laptop and check if the DVD drive reappears.
-
Update or Reinstall Driver: Visit Lenovo’s official website, navigate to the support section, and search for the latest driver for your DVD drive model. Download and install the driver to ensure you have the most up-to-date version.
-
Check Power and Data Connections: Ensure that the power and data cables connected to the DVD drive are securely plugged in. A loose connection can cause the drive to go missing.
If the issue persists even after trying these steps, it’s advisable to seek professional assistance or contact Lenovo’s customer support for further guidance.
Conclusion:
In this comprehensive FAQ-style subsection, we’ve covered the basics of how to open the CD drive on your Lenovo laptop, the best DVDs for Windows 10, troubleshooting VLC playback issues, and how to fix a missing DVD drive in Windows 10, 8, or 7. We hope this guide has provided you with the necessary information to tackle any CD drive-related queries or problems. Happy CD and DVD adventures with your Lenovo laptop!