The EGR (Exhaust Gas Recirculation) valve plays a crucial role in the engine’s emission control system, particularly in a Honda Civic. As responsible car owners, it is essential to understand the EGR valve’s function and know how to test it periodically. In this comprehensive guide, we will dive into the world of EGR valves, their significance, and the step-by-step process of testing them in a Honda Civic.
You may have heard about deleting the EGR valve, but is that a good idea? We will address this question and explore which tuners can assist in EGR deletion. So, whether you’re a DIY enthusiast or simply want to be more informed about your vehicle’s maintenance, let’s get started on testing the Honda Civic EGR valve and unravel some of the mysteries behind this vital component.
How to Test a Honda Civic EGR Valve
Understanding the Importance of EGR Valve Testing
Before we dive into the exciting world of testing Honda Civic EGR valves, let’s take a moment to appreciate the vital role these valves play. The Exhaust Gas Recirculation (EGR) valve is like the ultimate bouncer at a fancy club, regulating the flow of exhaust gases back into the engine. It ensures the perfect balance between power and pollution control, reducing harmful emissions while keeping your engine running smoothly. So, testing your EGR valve regularly is as essential as checking your horoscope before a blind date!
1. Fingers at the Ready: Preparing for the Test
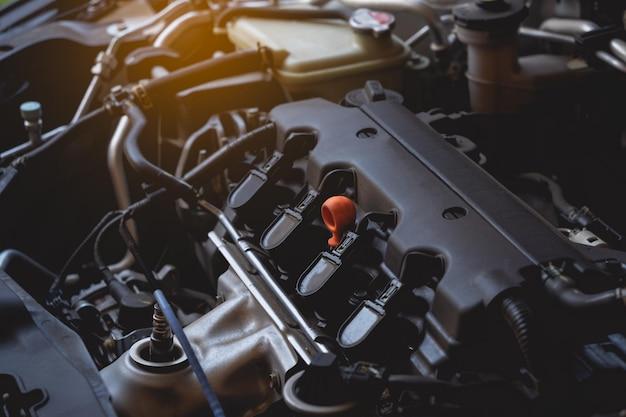
To test your Honda Civic’s EGR valve, you’ll need to channel your inner Sherlock Holmes mixed with a dash of techno-handyman skills. First things first, make sure your engine is as cooled down as your morning coffee. Locate the EGR valve carefully – it’s usually reclining somewhere near the top rear of the engine. Once you’ve found the sneaky little valve, grab a handy pair of gloves for that extra James Bond feel and get ready to wrangle with some engine parts!
2. Testing the EGR Valve: A Process of Wits and Wires
Now that you’re face to face with the EGR valve, it’s time to test its mettle. But fear not, dear DIY mechanic, for we have our trusty multimeter by our side for this adventure! Start by disconnecting the electrical connector from the valve, just as you would politely decline an unsolicited call from a telemarketer. With your multimeter set to resistance mode, measure the resistance across the two pins of the valve. If the reading falls within the specifications recommended by your vehicle’s manufacturer, congratulations! Your EGR valve has passed the first level of this vehicular video game.
3. Put the Valve to the Vacuum Test: Let the Drama Unfold
Now, dear reader, we enter a phase that will make plucking petals off a flower seem like child’s play. We’re talking about the vacuum test, where you’ll discover if your EGR valve can handle pressure like a politician during election season. Gently apply vacuum to the EGR valve using a handheld vacuum pump or a modified tire pump. Observe if the valve moves smoothly and stays closed when pressure is applied. If it fails to hold its ground or gets stuck like an embarrassing dance move, you might have to wave goodbye to your current EGR valve and grab a new one from the market.
4. Pay Attention to Those Pesky Codes: Reading the OBD Scanner
In the vast universe of automotive diagnostics, the OBD scanner is a Jedi knight guiding us through the mysteries of your Honda Civic’s inner workings. Connect an OBD scanner to your car’s diagnostic port, just like plugging in a USB to charge your phone. Let the scanner work its magic, revealing any trouble codes related to your EGR system. If these codes pop up on the scanner display like pimple ads on an acne-prone teenager’s web browser, it’s a sign that your EGR valve might need some further investigation or maybe a fancy dinner at a mechanic’s garage.
5. Trial and Error: Removing and Cleaning the EGR Valve
When all else fails, and your EGR valve seems to be causing more trouble than a cat with a laser pointer, it’s time to roll up your sleeves and get hands-on. Remove the valve and inspect it for any carbon deposits and blockages that might be clogging its performance. Gently clean the valve using a specialized cleaner or an old toothbrush (yes, you heard that right!). Show that valve who’s boss by scrubbing away the carbon buildup, giving it a fresh start worthy of a New Year’s resolution.
In Conclusion: EGR Valve Testing Triumphs
Now that you’ve conquered the wild world of Honda Civic EGR valve testing, you can confidently pat yourself on the back and consider applying for your honorary mechanical engineering degree (well, not really). Remember, regular testing and maintenance of your EGR valve will keep your car happy, your wallet relieved, and Mother Earth smiling down at you like a proud parent. So go forth, fellow DIY enthusiast, and share your newfound knowledge with the world, one EGR valve at a time!
FAQ: How Do You Test a Honda Civic EGR Valve?
Welcome to our comprehensive FAQ guide on testing a Honda Civic EGR valve! If you own a Honda Civic and suspect issues with your EGR valve, you’ve come to the right place. In this section, we’ll cover common questions related to EGR valve testing, including the benefits of an EGR delete, tuners that support EGR deletion, the function of an EGR valve, and step-by-step instructions on how to test your Honda Civic’s EGR valve.
1. Is It Good to Perform an EGR Delete
An EGR delete, while tempting for some performance enthusiasts, is not necessarily a good idea for every Honda Civic owner. An EGR (Exhaust Gas Recirculation) system plays a crucial role in reducing engine emissions and improving fuel efficiency. However, if you’re skilled enough and understand the potential consequences, an EGR delete could provide some performance gains. It’s essential to weigh the pros and cons before deciding whether an EGR delete is suitable for your particular needs and vehicle.
2. What Tuners Allow EGR Delete
There are several tuners on the market that offer support for EGR deletion. The most popular ones include Bully Dog, EDGE Products, SCT Performance, and H&S Performance. These tuners provide the necessary software and tools to modify the EGR settings in your Honda Civic’s engine control unit (ECU). However, it’s crucial to note that EGR deletion may not be legal in all states or countries due to emissions regulations. Always research and comply with your local laws before attempting any modifications.
3. What Does an EGR Valve Do
Think of the EGR valve as a superhero cape for your Honda Civic’s engine. Its primary function is to reduce harmful emissions by recirculating a portion of exhaust gases back into the intake manifold. By reintroducing these gases, the combustion temperature is lowered, which reduces the formation of nitrogen oxides (NOx). Additionally, an EGR valve helps improve fuel efficiency and engine performance by controlling the amount of oxygen entering the cylinders.
4. How Do You Test a Honda Civic EGR Valve
Testing your Honda Civic’s EGR valve is a crucial step in troubleshooting potential issues. Follow these simple steps to perform the test:
Step 1: Gather the Tools
You’ll need a digital multimeter, a vacuum pump, a vacuum gauge, and a service manual specific to your Honda Civic model.
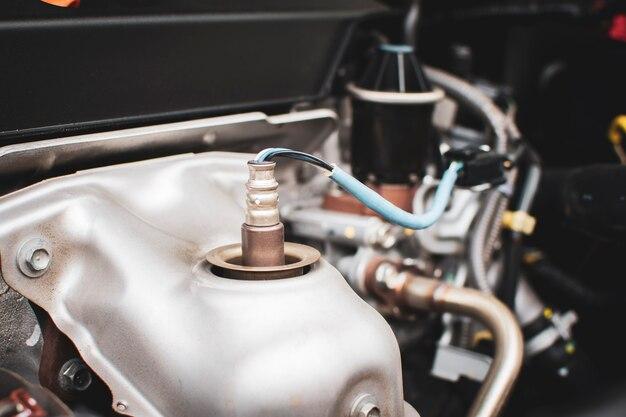
Step 2: Locate the EGR Valve
The EGR valve is typically located near the intake manifold or throttle body. Consult your Honda Civic’s service manual for the exact location.
Step 3: Disconnect the EGR Valve
Detach the vacuum hose from the EGR valve and plug it with a vacuum gauge. This step is to ensure that the engine won’t receive any vacuum pressure during the test.
Step 4: Measure Resistance
Using the multimeter, set it to the resistance mode and check the continuity of the EGR valve’s electrical connector. If there is an open circuit or a significant deviation from the specified resistance range, the EGR valve may be faulty and require replacement.
Step 5: Apply Vacuum
Connect the vacuum pump to the EGR valve and gradually apply vacuum pressure. Observe the vacuum gauge and ensure that the valve holds vacuum. Any leaks or failure to hold vacuum may indicate a faulty EGR valve.
Step 6: Check for Stuck Valve
With the engine running, connect the vacuum hose back to the EGR valve and tap it lightly. If the engine stumbles or stalls, it suggests a stuck or improperly functioning valve.
Remember, if you’re unsure or uncomfortable performing these tests, it’s always best to consult a professional mechanic to ensure accurate results and prevent any potential damage.
Congratulations on completing our FAQ-style guide on testing a Honda Civic EGR valve! We hope you found this information helpful and entertaining. Remember, regular maintenance and proper testing can help keep your Honda Civic running smoothly while minimizing emissions. Whether you decide on an EGR delete or not, make informed choices that align with your vehicle’s needs, local regulations, and your driving preferences. Stay tuned for more exciting automotive tips and tricks. Happy driving!