Welcome to our blog post on how to remove an iPad protective case! If you’re a proud iPad owner, you know how important it is to keep your device safe from accidental drops, scratches, and spills. A protective case is one of the best investments you can make to ensure the longevity of your iPad. However, there may come a time when you need to remove the case for various reasons. Whether you want to switch to a different case, clean your iPad, or perform some maintenance, we’ve got you covered.
In this article, we’ll guide you through the step-by-step process of safely removing an iPad protective case. We’ll also answer some frequently asked questions related to iPhone 12, such as how to close all tabs, check running apps, and the possibility of having 5G connectivity. So, if you’re ready to give your iPad a breather or explore what’s beneath that snug protective case, let’s dive right in!
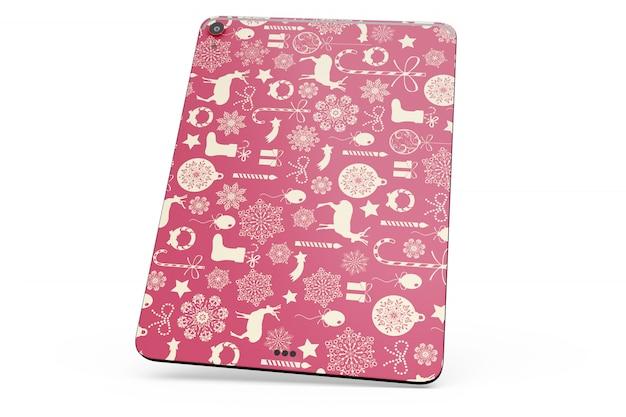
How to Easily Remove an iPad Protective Case
Step 1: Prepare for Action!
Having a protective case for your iPad is great. It shields your precious device from the evils of scratches, bumps, and unexpected gravity experiments. But what happens when you want to switch cases or maybe just give your iPad a little bit of fresh air? Time to remove that case, my friend!
Step 2: Assess the Situation
Before we jump into the delicate art of case removal, let’s do a little investigative work. Take a good look at your iPad case and identify any release buttons, latches, or secret hidden compartments like an undercover agent hunting for clues. Familiarize yourself with the battlefield, so to speak.
Step 3: Master the Technique
Now, let’s get down to business. Grip your iPad firmly but gently, as if you were cradling a unicorn’s egg. We don’t want any accidents here. Begin by applying mild pressure on the corners of your iPad, nudging the case away ever so slightly. Don’t be afraid to use a little persuasion; just remember, gentle giants get the job done.
Step 4: The Twist and Shout Method
Here comes the fun part. With your grip still intact, give the case a tiny twist, just like you’re following the dance moves of a 90s boy band. The twist should loosen the case’s grip on your iPad, allowing it to slide off with ease, like a new pair of socks on a waxed floor.
Step 5: Celebrate Your Victory
Voilà! You’ve successfully liberated your iPad from its protective case. Take a moment to savor the accomplishment, maybe do a little victory dance. You’ve defied the odds and overcome the challenges of modern technology. Bravo!
Bonus Tip: Patience Is a Virtue
Remember, my friend, Rome wasn’t built in a day, and neither was the art of removing iPad cases. If you encounter any stubborn cases that refuse to let go, take a deep breath and summon the power of patience. Maybe try some sweet-talking or gentle persuasion, but never, under any circumstances, resort to violence or excessive force. We’re all about peace, love, and iPads here.
With these simple steps in mind, you’ll find removing your iPad protective case a breeze. Don’t let a clingy case hold you back from exploring new styles. Now go forth and dress your iPad in the latest fashions, knowing that you have the power to remove its case whenever you feel like it. Happy case swapping!
FAQ: How to Remove an iPad Protective Case?
Whether you’re tired of the old design, need to repair your iPad, or simply want to give it a well-deserved breather, removing a protective case is essential. But don’t worry, we’ve got your back! Here are some frequently asked questions on how to gracefully bid adieu to that stubborn iPad case.
How do I remove an iPad protective case
Removing an iPad protective case may seem like a herculean task, but fear not! Just follow these simple steps:
-
Find the courage to part ways: It’s always a little emotional saying goodbye, even to an inanimate object. Take a deep breath and remind yourself that change is good!
-
Inspect the battlefield: Carefully examine your iPad and the protective case. Look for any clasps, hinges, or tricky buttons that may be holding it in place. Knowledge is power!
-
Channel your inner MacGyver: Based on your investigation, determine the best approach to free your iPad. Sometimes it’s a matter of unsnapping a couple of latches or delicately sliding it out. Remember, patience is key!
-
Conquer and adapt: With your newfound knowledge, confidently maneuver the necessary mechanisms to release your iPad from its protective fortress. Use gentle yet firm pressure—it’s all about finesse!
How do I remove a Targus cover from my iPad
Ah, the infamous Targus cover—an enigma wrapped in a riddle. But worry not, dear reader! We have the secret decoder ring to liberate your iPad from its Targus prison.
-
Prepare for the mission: Take a moment to envision your iPad free from the clutches of the mysterious Targus cover. Visualize success and let that motivation fuel your quest.
-
Identify the enemy: Inspect your Targus cover and look for any hidden traps or covert mechanisms that could be hindering your progress. Remember, knowledge is your greatest weapon!
-
Strike with finesse: Armed with the knowledge of your enemy, carefully employ the tactics necessary to disengage the Targus cover from your iPad. Be patient, be persistent, and most importantly, be gentle!
How do I open an iPad case? Are there any secret codes involved
Opening an iPad case can sometimes feel like unlocking a treasure chest filled with technological wonders. Rest assured, brave adventurer, it’s simpler than deciphering secret codes!
-
Embrace your inner explorer: Prepare yourself mentally for the journey ahead. Adventure awaits, and it’s time to set sail!
-
Identify the hidden mechanisms: Inspect your iPad case for any hidden buttons, latches, or magical spells necessary to open it. Keep your wits about you, and the answers will reveal themselves!
-
Solve the puzzle: Armed with the knowledge acquired in your quest, gingerly activate the hidden mechanisms and unlock the wonders within. Remember, this isn’t a race—it’s an intellectual feat!
How do I close or remove apps on my iPhone 12
Closing apps on your iPhone 12 is a necessary skill in the digital realm. Don’t let those virtual clutter bugs get the best of you. It’s time to learn how to declutter your technological sanctuary!
-
Gather your digital broom: Picture yourself as a virtual janitor, tidying up after the app party is over. Pro tip: imagine a stylish uniform to boost your confidence!
-
Navigate to the app circus: Double-click your iPhone 12’s home button to reveal the mystical realm of running apps. Behold the colorful carousel of activities.
-
Cast out unnecessary apps: With a flick of your virtual broom, swipe upwards on the apps you wish to banish. Watch them disappear into the digital abyss from whence they came!
Now that you’re armed with all the knowledge to gracefully bid farewell to your iPad’s protective case, it’s time to embrace change and give your device a new lease on life. Happy unencasing, my tech-savvy friend!