Are you struggling to connect your Smart TV to Dish Network? Don’t worry, you’re not alone! With the advancements in technology, setting up your entertainment system can sometimes feel like solving a puzzle. But fear not, we’re here to help you navigate through the process effortlessly.
In this blog post, we’ll guide you step-by-step on how to connect your Smart TV to Dish Network. Whether you’re facing issues with changing sources, enabling HDMI, or fixing TV sources, we’ve got you covered. By the end of this guide, you’ll be able to enjoy your favorite shows and movies on your Smart TV with ease.
So, let’s dive in and make the most out of your home entertainment setup!
How to Connect Your Smart TV to Dish Network
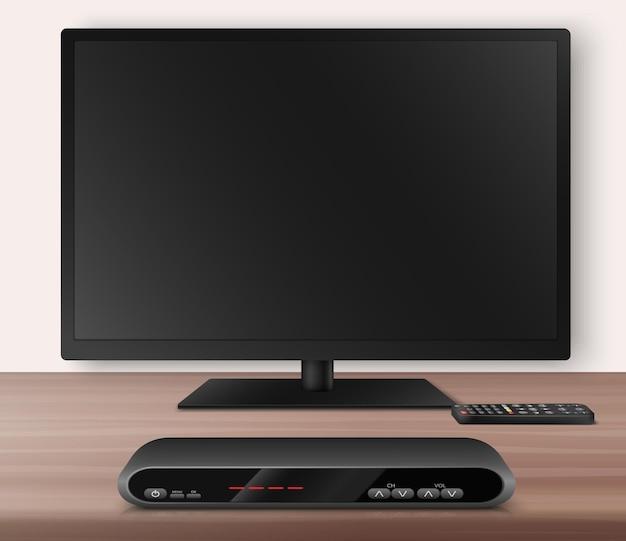
So, you just got a fancy new Smart TV and you’re all ready to kick back and binge-watch your favorite shows. But wait, how do you connect it to your Dish Network? Don’t worry, we’ve got you covered! In this guide, we’ll walk you through the process of connecting your Smart TV to Dish Network, so you can start enjoying your favorite programs in no time.
Step 1: Check Your Equipment
Before we dive into the nitty-gritty, let’s make sure you have everything you need. Grab your TV remote and locate the “Menu” button. Click on it and navigate to the settings menu. Look for the “Network” or “Internet” option – this is where the magic happens. Make sure your TV is equipped with built-in Wi-Fi or has an Ethernet port to connect to your home network. If not, you may need to purchase a separate adapter – in that case, make sure to consult your TV’s manual or contact the manufacturer for guidance.
Step 2: Get Your Wi-Fi Password Ready
Connecting your Smart TV to Dish Network requires a Wi-Fi connection. If you haven’t done it already, go ahead and find that secret slip of paper where you scribbled your Wi-Fi password ages ago. It’s time to put your detective skills to the test! If you’re lucky, you might even have a fancy memory that remembers your Wi-Fi password for you. If not, don’t worry – we’ve all been there. Go ahead and grab that password now; your Smart TV will thank you for it later.
Step 3: Connect to Your Wi-Fi Network
Now that you’ve tracked down your Wi-Fi password, it’s time to connect your Smart TV to your home network. Using your TV remote, navigate to the “Network” or “Internet” section in the settings menu. Select the Wi-Fi option and scan for available networks. Find your Wi-Fi network name (also known as SSID) and select it. If prompted, enter your Wi-Fi password, and voila! Your Smart TV is now connected to your Wi-Fi network.
Step 4: Set Up the Dish Network App
Once your Smart TV is happily connected to your Wi-Fi network, it’s time to set up the Dish Network app. Head over to your TV’s app store – it might be called something like “Smart Hub” or “App Gallery.” Search for the Dish Network app and hit that install button. Now, grab your popcorn and wait patiently while the app downloads and installs itself. Almost there!
Step 5: Sign In and Enjoy!
With the Dish Network app all set up on your Smart TV, it’s time to sign in and dive into a world of entertainment. Launch the app and enter your Dish Network account credentials. If you don’t have an account yet, fear not! Just follow their instructions to sign up and create one. Once you’re signed in, you’ll have access to all your favorite channels and shows. Grab that remote, kick back, and let the binge-watching begin!
There you have it – a step-by-step guide on how to connect your Smart TV to Dish Network. Now you can spend less time fumbling with wires and more time enjoying your favorite shows. Get ready for some epic movie marathons and TV show binging sessions. Happy streaming, and may your Wi-Fi signal always be strong and stable!
FAQ: How Do I Connect My Smart TV to Dish Network?
Why Won’t My Samsung TV Let Me Change Source
If your Samsung TV is not allowing you to change the source, there could be a few reasons behind this frustrating issue. First, ensure that your TV is on the correct input mode for the source you want to change to. Usually, you can cycle through input modes using your TV remote’s “Input” or “Source” button. If that doesn’t work, check if all your cables, especially the HDMI ones, are securely connected. Sometimes a loose cable can prevent your TV from recognizing the source. Lastly, if you’re using an external device like a cable box or streaming stick, make sure it is powered on and properly connected to your TV.
How Do I Enable HDMI on My Samsung TV
Enabling HDMI on your Samsung TV is a piece of cake! Follow these steps to get it up and running:
- Grab your Samsung TV remote and press the “Menu” button.
- Using the arrow keys, navigate to the “Settings” menu and press “Enter.”
- Within the “Settings” menu, locate and select “General.”
- Scroll down and choose “External Device Manager.”
- From there, click on “HDMI UHD Color.”
- You will see a list of HDMI ports on your TV. Select the appropriate HDMI port you want to enable.
- Toggle the switch to turn on UHD Color for that HDMI port.
- Press the “Exit” or “Menu” button to save your changes.
Voila! You’ve now successfully enabled HDMI on your Samsung TV!
How Do I Change My TV2 on Dish
Changing TV2 on your Dish Network is a breeze. Just follow these simple steps:
- Grab your Dish Network remote control.
- Ensure that both your TV1 and TV2 are powered on.
- On the remote, press the “Menu” button.
- Use the arrow keys to navigate to the “System Setup” option and press “Select.”
- From the System Setup menu, choose “Installation.”
- Select “Modulator Setup” from the Installation menu.
- On the Modulator Setup screen, locate “TV2 Out” and adjust the channel to your desired setting. Note down the channel number for TV2.
- Press the “Done” button to save your settings.
And that’s it! You have successfully changed your TV2 on Dish. Now you can enjoy your favorite shows on TV2 without any hassle.
Why Does My TV Say No HDMI Signal
If your TV is displaying the dreaded message “No HDMI Signal,” don’t panic! Here are a few troubleshooting steps to help you get back on track:
- First, check if your HDMI cable is securely connected to both your TV and the device you’re trying to connect (such as a cable box or game console). Sometimes a loose connection can cause this issue.
- If the cable is connected properly, try disconnecting and reconnecting it to ensure a solid connection.
- Check if your HDMI port is the active input source on your TV. Use your TV remote’s “Input” or “Source” button to cycle through the available options until you find the correct HDMI input.
- If you have multiple HDMI ports on your TV, try using a different HDMI port to rule out any issues with a specific port.
- Restart your TV and the device you’re connecting to it. Sometimes a simple restart can fix temporary glitches.
- If none of the above steps work, try using a different HDMI cable or test the device on a different TV to identify if the issue lies with the TV or the device.
By going through these troubleshooting steps, you should be able to resolve the “No HDMI Signal” issue and get back to enjoying your favorite shows and movies without any interruptions.
How Do I Fix My TV Source
If you’re having trouble with your TV source, worry not! Here are a few simple steps to help you fix the issue:
- Start by checking all the cables connected to your TV. Ensure they are securely plugged in and haven’t come loose.
- Press the “Input” or “Source” button on your TV remote. This will cycle through the available input sources. Keep pressing the button until you find the correct source for your desired content.
- If you’re using an external device like a cable box or streaming device, make sure it is powered on and connected properly to your TV. Sometimes a device may accidentally power off or experience a temporary glitch.
- Confirm that the source device itself is functioning properly. Test it on another TV or try connecting a different device to your TV to identify if the issue lies with the source or the TV itself.
- Restart your TV and the source device. A simple restart can often fix temporary glitches.
These steps should help you troubleshoot and fix your TV source issues. Soon enough, you’ll be back to enjoying your favorite programs in no time!
How Do I Connect My Smart TV to Dish Network
Ready to connect your Smart TV to Dish Network? Follow these simple steps:
- Connect the HDMI cable from your Dish Network receiver to an available HDMI port on your Smart TV.
- Use your TV remote’s “Input” or “Source” button to select the corresponding HDMI input where you connected the Dish Network receiver.
- Turn on both your Smart TV and the Dish Network receiver.
- On your TV screen, you should now see the Dish Network setup screen. Follow the on-screen instructions to complete the initial setup process, which involves entering your Dish Network account credentials and activating the receiver.
- Once the setup is complete, you should be able to access all the Dish Network channels and features on your Smart TV.
- To switch between your Smart TV apps and the Dish Network channels, simply use your TV remote’s “Input” or “Source” button to select the appropriate HDMI input for each.
Now you can enjoy the best of both worlds – the smart capabilities of your TV along with the wide range of channels and content provided by Dish Network.
That wraps up our comprehensive FAQ section on connecting your Smart TV to Dish Network. Hopefully, this guide has helped you troubleshoot any issues and navigate through the setup process with ease. Happy TV watching!